Monday, November 1, 2010

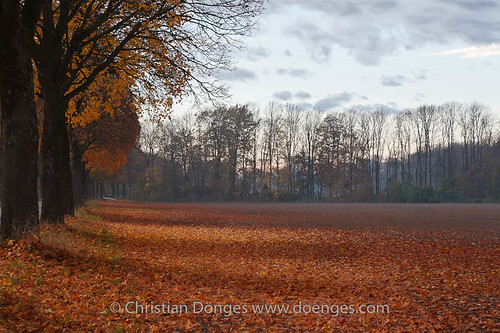
Autumn Foliage

Autumn has been around for a few weeks now, and for the last two weeks or so, we've had some pretty fantastic light, especially in the morning. And for the last two weeks or so, I have either been unable to shoot at all or the images did not turn out the way I wanted them.

You can image my delight when, this weekend, I finally got everything just right ...

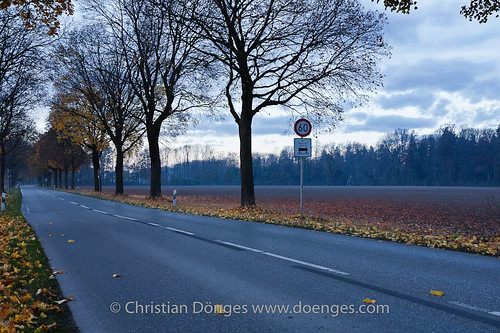
This one was taken very early:

Autumn Road
Autumn Road


and this one later, when the sun was already up a bit, but still mostly behind clouds:

Autumn Treescape
Autumn Treescape

Both are the same row of trees, jut very different perspectives.

Sunday, October 31, 2010

[Linux] Xfec crashes after login

Disclaimer: This off-topic post is about a solution to a problem that you will only have if you use Linux. If you are of the Mac or Windows persuasion, you're free to look at some cool photos of mine, because this is definitely not your problem. :)

If you log in and then Xfec (or Gnome) crashes before the desktop is visible, and you can't read the error message that briefly appears on a console screen, you are probably seeing the bug I saw today.
Try this:
  1. Start a terminal session so you can log in. You do this by pressing  <1> in the login screen. Then log in. To get back to the graphical screen, press <8>.
  2. After logging in, you will be in your home directory. Check if the file .ICEauthority is readable by you:
    $ cat .ICEauthority
  3. You should get an error message. If you do not, you have a different problem and I won't solve it (at least not in this post ;-).
  4. If you did get an error message, delete the file and re-create it:
    $ rm .ICEauthority
    $ touch .ICEauthority
  5. If you log in now using the graphical login screen, xfce (or Gnome) should start up just fine.
Enjoy using Linux!

    Saturday, October 30, 2010

    Water Lily

    The water lily (a.k.a Nympahea) in the image below was in a pond in a public garden. It was evening (we actually made it out just as they where locking up) and rapidly getting dark. I did not have a flash ready, so I shot a few frames as ISO 800, meaning to capture the wonderful dark pink color of the petals and the rich dark yellow of the stamina against the reflections of the dark water.

    It turns out that I dislike the noise in the color image to the point of finding it objectionable. Noise reduction did not really work for me, because it removed all the texture from the petals due to smoothing. Before tossing the image, I decided to try it in black and white (thanks, Lenswork, for reminding me that black and white is not dead! But that's for another post.)

    In black and white, I like the slightly gritty texture on the petals that is caused by the noise.

    Water Lily
    Water Lily

    What is, unfortunately, not visible here is the huge number of tiny drops on the petals. You can
    see some of them (as splotches) on the petal in the 9 o'clock position, but there is a huge number of them on most of the petals. Either they are too small to be seen at this size, or my skill is insufficient to make them visible at this resolution - they are definitely there in the full image.

    Does anyone want to purchase a print? ;-)

    Saturday, October 23, 2010

    Image Clarity 101: Depth-of-Field

    In the last post, we looked at how a sharp image is created optically. In this post, we will look at how the physics render non-flat objects.

    If all the points of the subject are in the same plane, they will all render with the same size circle of confusion in the image plane. This is the case if the subject is perfectly flat.

    For non-flat subjects, the points of the subject are located at different distances from the image plane. So the projected points will have a minimal circle of confusion in different image planes. Since there is only one image plane, the projected points will all have different size circles of confusion - which means they will all be of different sharpness.

    Each circle of confusion that is small enough will appear to be sharp. The distance from the nearest to the furthest point which are just rendered sharply is the depth of field.

    The depth of field is determined by the distance of the subject from the camera, the focal length of the lens, and the aperture.

    Some simple rules of thumb are:

    1.  The further the subject from the lens, the greater the depth of field for a given focal length.


    The greater the absolute distance between subject and lens, the smaller the relative difference in distances for different points of the subject. Because of this, the size of the circles of confusion are very similar in size.

    If you look at the distance scale on a lens, you will notice that the distance between markings decreases the closer you get to infinity. And, speaking of infinity, there is a point from which on everything is in focus if you focus the lens to infinity.

    2. The shorter the focal length, the greater the apparent depth of field at a given distance.


    The hyperfocal distance, or the distance from the image plane past which every subject point is acceptably sharp if the lens is focused on infinity, decreases the shorter the focal length of the lens. This is because the magnification decreases, so the circle of confusion for a given subject point is also magnified less.

    Remember though, that this is true only for a fixed distance!

    3. The smaller the aperture, the greater the depth of field.


    The smaller the aperture, the smaller the cone of light rays that passes to the image plane. Because the cone is smaller, the circle of confusion is also smaller.

    In the illustration below, the aperture blocks the blue cone of light rays, only the red cone gets through. The circle of confusion on the image plane is smaller, so the image is sharper.
    Illustration 3: A smaller aperture reduces the circle of confusion

    Note that in practice, diffraction becomes a problem at small apertures. Diffraction will be discussed later in this series.


    Bigger is not better

    One important thing to keep in mind is that bigger is not necessarily better with depth of field. An image may actually be improved if (unimportant) parts are kept out of focus because the eye tends to focus (pun intended) on the part of the image which are sharp and tends to give the unsharp parts only cursory attention.

    That said, if you are trying to render your image as clearly (sharp) as possible, you want to select your depth of field in such a way that the closest and furthest subject point which you want sharp are in focus.

    For example, have a look at this image:
    Forget-me-not
    Image 1: The forget-me-not in the foreground is sharp, the background blurred.
    The forget-me-not flower in the foreground is rendered in focus. The (rather cluttered) background is rendered out of focus.  The eye of the beholder will pass over the out of focus parts, thereby de-emphasizing the non-essential parts and concentrate on the subject in the foreground.

    Friday, September 10, 2010

    Image Clarity 101: What makes an image sharp?

    A common problem with photos is lack of sharpness. The image is either soft, or out of focus, or the wrong part of the image is in focus, or ... the list of possible issues is a long one.

    Just like exposure, focus is one of the parameters that the photographer must learn to control in order to create images that show what he or she visualized before pressing the shutter release.

    This is the first of a series of posts that I will call "Image Clarity 101". The name is a tip of the hat to John B. Williams who wrote the excellent "Image Clarity: High-Resolution Photography", which - alas - seems to be out of print.

    I am going to look at what causes an image to be "sharp". In later postings, I will explain what equipment and techniques to use to actually get an image to be "sharp".

    Focus

    If we imagine that a subject is made up of an infinite number of minuscule points, each of these points emits an infinite number of light rays that hit the entire area of the camera lens. As the light rays pass through the lens, they are focussed on some point (the focal point) behind the lens, creating a cone of light.

    Parallel to the lens plane is the focal plane, which holds an infinite number of focal points for all the visible points of the subject.

    All of this is shown in the illustration below.

    Illustration 1: Focus Explained (simplified)

    The image plane is the surface the image is projected onto. This is where the film or image sensor is located. For an image to be in focus, the image plane must be the focal plane.

    When you twist the focus ring on a lens, you are effectively moving the focal plane. When the image is sharp, the focal plane is located on the image plane.

    Are you with me so far? Good!

    Circle of Confusion

    Now it gets a bit messier: since we are dealing with the real world, the light rays do not actually all converge on a single point, but form a small area, the circle of confusion

    In the illustration above, you can see that in the focal plane most of the light originating from a single point of the subject hits the small circle. As the image plane moves away from the focal plane, the light is spread over a larger area.

    If this is too circle of confusion business to too confusing, have a look at the following, simplified illustration:

    Illustration 2: Cone of Light
    The subject is projected by the lens as a cone of light rays which strike the image plane. The tighter the cone is at the image plane, the close the image plane is to the focal plane.

    If the circle of confusion is small enough, the human eye will register it as a single point. How small the circle needs to be is perhaps a topic for another post. For the time being, we can assume that if the circle of confusion is somewhat smaller than a single photo site on the sensor, it will not be a limiting factor for the overall sharpness of the image.

    Illustration 3: As the circle of confusion increases, the image becomes less sharp.

    So we reach a simple conclusion:

    If a single point of the subject is rendered as a small enough circle of confusion, it will appear sharp in the image.


    There is one important point to consider: all of what has been discussed above is only true for flat subjects and ideal lenses. In the next installment, we will look at sharpness for a non-flat subject.

    You may find a used copy of the excellent Image Clarity here:
    Amazon USA Amazon UK Amazon DE

    If you don't feel like getting an old book, you might try perusing the good old Wikipedia which contains much more on the subject.
    Sunday, August 29, 2010

    Bee on a Tattered Heliopsis Flower

    I have been doing a lot of macro work lately, mostly studying my favorite summer garden flowers: oxeye (aka heliopsis).

    The oxeye blossom has an interesting life-cycle, that may be the subject of a future post. In the following image, I found a blossom near the end of its lifespan: the petals are coming apart and the whole appearance of the flower is ... tattered.

    Still, there was apparently enough pollen and nectar left in the center to make it interesting enough for bees to come visiting.

    Bee on a Tattered Heliopsis Flower

    Because there was a slight wind causing the blossom to sway on its long stalk and because the bees where buzzing about, I decided to shoot hand-held, not from a tripod. Despite the bright afternoon sun, I needed some additional flash in order to get the short exposure time required to eliminate motion blur.

    So there I was holding the camera in my left hand and a speedlite attached via a short cord in the other hand ... No idea what the neighbors where thinking, but then, they should be used to me by now. :-)

    I think I will get a flash bracket real soon now.
    3GNAGC2URTQQ

    Tuesday, August 10, 2010

    Pink Anemone XXV

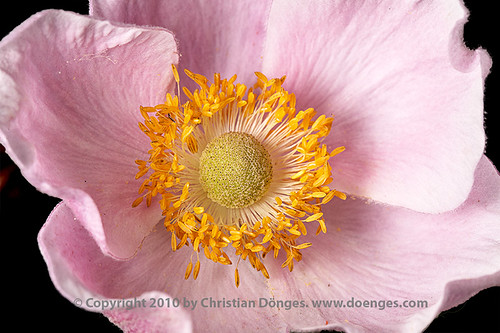
    About three quarters of a year after Anemone against the Light I have created another image of a pink anemone flower, this time lit from the front.

    Anemone XXV
    Anemone XXV

    The flower was growing in the shade of a hedge, so a speedlight to camera left provided additional light. I used a reflector to camera right to soften up the shadows.

    Monday, August 9, 2010

    Decaying Beauty and Lavender Rose

    I've been quite busy lately, fortunately not too busy to test the wonderful Canon EF 100/2.8L USM Macro lens. We've had a lot of rain so the garden is not offering quite its usual abundance of flowers, but I've managed to get a few passable pictures:

    Decaying Beauty
    Decaying Beauty

    and

    Lavender Rose
    Lavender Rose

    Both are roses, of course, the first being well past its prime, with the petals all wilted and gone. It was taken in available light using just a tripod for support.

    The second is a fresh rose with lavender. I place both in a small vase, hung up a black cloth for the background, and used two speedlights for lighting. The first is to camera right, the second is to camera left, behind the flower.

    Wednesday, May 19, 2010

    Fireshow

    Sanja Vatra asked me to take some pictures of her fire show during the Uferlos Festival last week. I was more than happy to oblige.

    The weather was horrible, it was raining cats and dogs. Despite this, a nice crowd gathered to see a great show.

    Sanja Vatra Poi Fireshow

    In order to get the fire swirling and some of the background, I dragged the shutter at 1/3s. The auto-focus of the Canon 5D decidedly did not feel up to the task, so I used f/8 for a good depth-of field and focused manually. These choices left me to use ISO 400 in order to expose the fire right.

    I then fired the flash on ETTL with -1EV compensation to Sanja properly. Judging by the recycle time, the flash was firing full pop.

    Looking at the pictures on the camera LCD after the show, I thought the whole effort was wasted. After I got home, warm, and dry, I had another look on the computer and felt much better. :)

    Have a look at my Flickr! photostream for some more pictures.

    Saturday, May 1, 2010

    Bleeding Heart Flowers

    The windflowers in the last post are wilting away, unfortunately before I had a chance to re-visit them. Instead, the bleeding heart flowers are in full bloom - such is the cycle of life.

    The bleeding heart, also known as Venus's car, Dutchman's trousers, lyre flower or by their latin name lamprocapnos spectabilis is originally from Korea and north and western China, but it seems to do very well in almost any temperate climate, so it is a very popular garden plant.

    We simply let it grow and cut the wilted stalks short in the fall and they come back year after year.

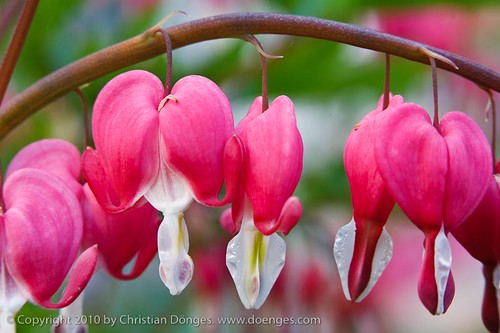
    Bleeding Heart Flowers in a Row

    In order to take the photo, I mounted the camera on a tripod and used an insane amount of extension (over 50 mm for a 70-200 mm lens). Despite an aperture of f/16, the depth of field is extremely shallow, about 2-3 mm in my estimate. That, combined with the light wind that moves the flowers like swings on a playground, made it challenging to get sharp images.

    What really amazes me is how the lower white parts of the blossoms are textured. I had never noticed this with the real flowers before taking these pictures. Which just goes to show how photography can expand your awareness of the world. :-)

    Sunday, April 25, 2010

    White Windflowers

    The weather has finally turned sunny and warm, spring is definitely here. In fact, it's almost warm enough to be early summer.

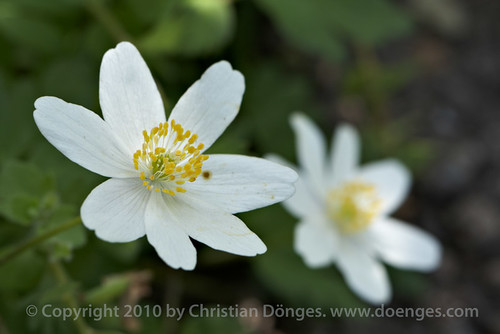
    These beautiful white flowers grow in my garden under a rose bush. They are windflowers, also known as wood anemone, windflower, (European) thimbleweed, smell fox, or by their latin name anemone nemorosa.

    White Windflowers

    The flower is quite small (about 2 cm across), so I had to get very close using an extension ring between the lens and the camera. A tripod was required, of course. ;-)

    Thursday, March 18, 2010

    Rehearsal of the "Joseph"

    Last weekend I had a really fun assignment shooting a rehearsal of the musical "Joseph and the Amazing Technicolor Dreamcoat" by Andrew Lloyd Webber and Tim Rice. It will be performed May 13th and 14th in Freising by a cast of almost 300 people.

    What I saw was breathtaking - a stunning performance. Even though the performers are all laymen and -women, the choreographer, director, voice coaches, etc. are all pros working pro bono - and it shows.

    Here are some impressions, you can find more on my Flickr! page in the Joseph set.

    Grim Brothers

    Angry brothers shout at the Narrator


    Josephs brothers and the narrator practice dance moves.

    Colorful children.

    In case you have been looking carefully and feel confused: there are two different narrators to cover all four performances. :)

    Thursday, February 18, 2010

    Nightfall Construction

    Walking the streets, I came upon a fascinating construction site. An older concrete building was being torn down to make room for some modern apartment buildings.

    As I watched, the last glow of sunlight disappeared and the moon became the brightest object in the sky. The rubble and the construction equipment turned into silhouettes, giving them a strange quality.

    Nightfall Construction

    The times when the sun appears and disappears from the sky are often the best times for photography because light is most interesting then. Nightfall certainly is the most convenient of these times - I don't have to get up early. ;-)

    Wednesday, February 3, 2010

    Ice Crystal Colors II

    More ice crystals:

    [caption id="" align="aligncenter" width="500" caption="Ice Crystal Colors II"]Ice Crystal Colors II[/caption]

    Monday, February 1, 2010

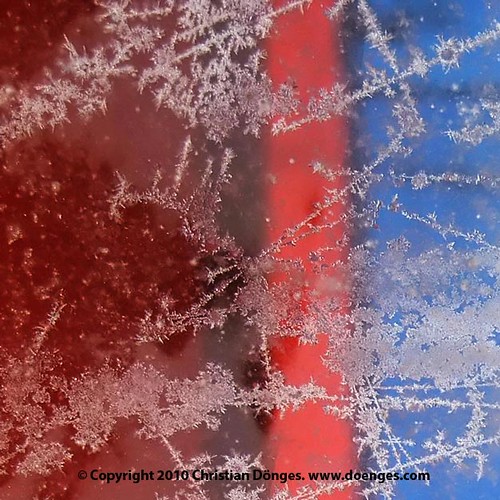
    Ice Crystal Colors I

    It is currently rather cold and it snows quite a bit in Bavaria. On Sunday the sky was a clear blue and the sunlight was crisp and clean, lighting these ice crystals beautifully:

    [caption id="" align="aligncenter" width="500" caption="Ice Crystal Colors I"]Ice Crystal Colors I[/caption]

    Can you guess what the background is?

    Monday, January 4, 2010

    Winter Storm

    Storm clouds rising over a winter field, lightly covered in snow. For a few minutes the low afternoon sun bathed the landscape in soft golden light while blue and purple clouds boiled above.

    [caption id="" align="aligncenter" width="500" caption="Winter Storm"]Winter Storm[/caption]

    Sunday, January 3, 2010

    Foggy Lakeside

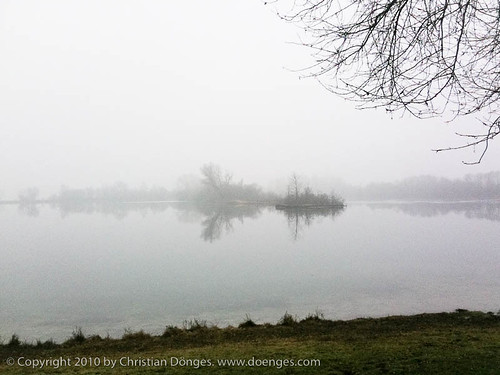
    This really should have been published a couple of days ago, because it was taken on the first afternoon of this year. It was unusually warm, and had been from Christmas, which you can tell because the snow is completely gone. I guess this is why there was quite a bit of fog.

    [caption id="" align="aligncenter" width="500" caption="Foggy Lake"]Foggy Lake[/caption]

    The grass on the shore in the foreground is green, the rest of the image is desaturated because of the fog. I think this is more of an autumn mood rather than winter, but what a poetic way to start the new year by showing that it is impossible to see far through the fog of time!

    Saturday, January 2, 2010

    Tracks in the Snow

    Winter has arrived here in Germany and it is getting cold and snowy. On an outing I found a frozen pond with crisp, fresh snow on the frozen surface which an animal, probably a dog, had explored.

    [caption id="" align="aligncenter" width="500" caption="Tracks in the Snow"]Animal tracks in fresh snow.[/caption]

    I like the way the sunlight plays on the white surface with the shadows appearing blue, not black, because of the ice.